
The Squeeze app allows you to quickly and easily create landing pages for lead capture, content sharing, announcements, and more. Unlike the Gutenberg  Pages editor, you don't need to add blocks and move them around manually to create an attractive layout. Simply choose a template you like, edit the text, images, links, and buttons, and publish it to your LeadSite!
Here is a video guide to creating a Squeeze page:
Here is a step-by-step guide to creating a Squeeze page:
Navigate to the  Squeeze app. You will find it in the Lead Capture Apps section of your dashboard's
  Apps tab.
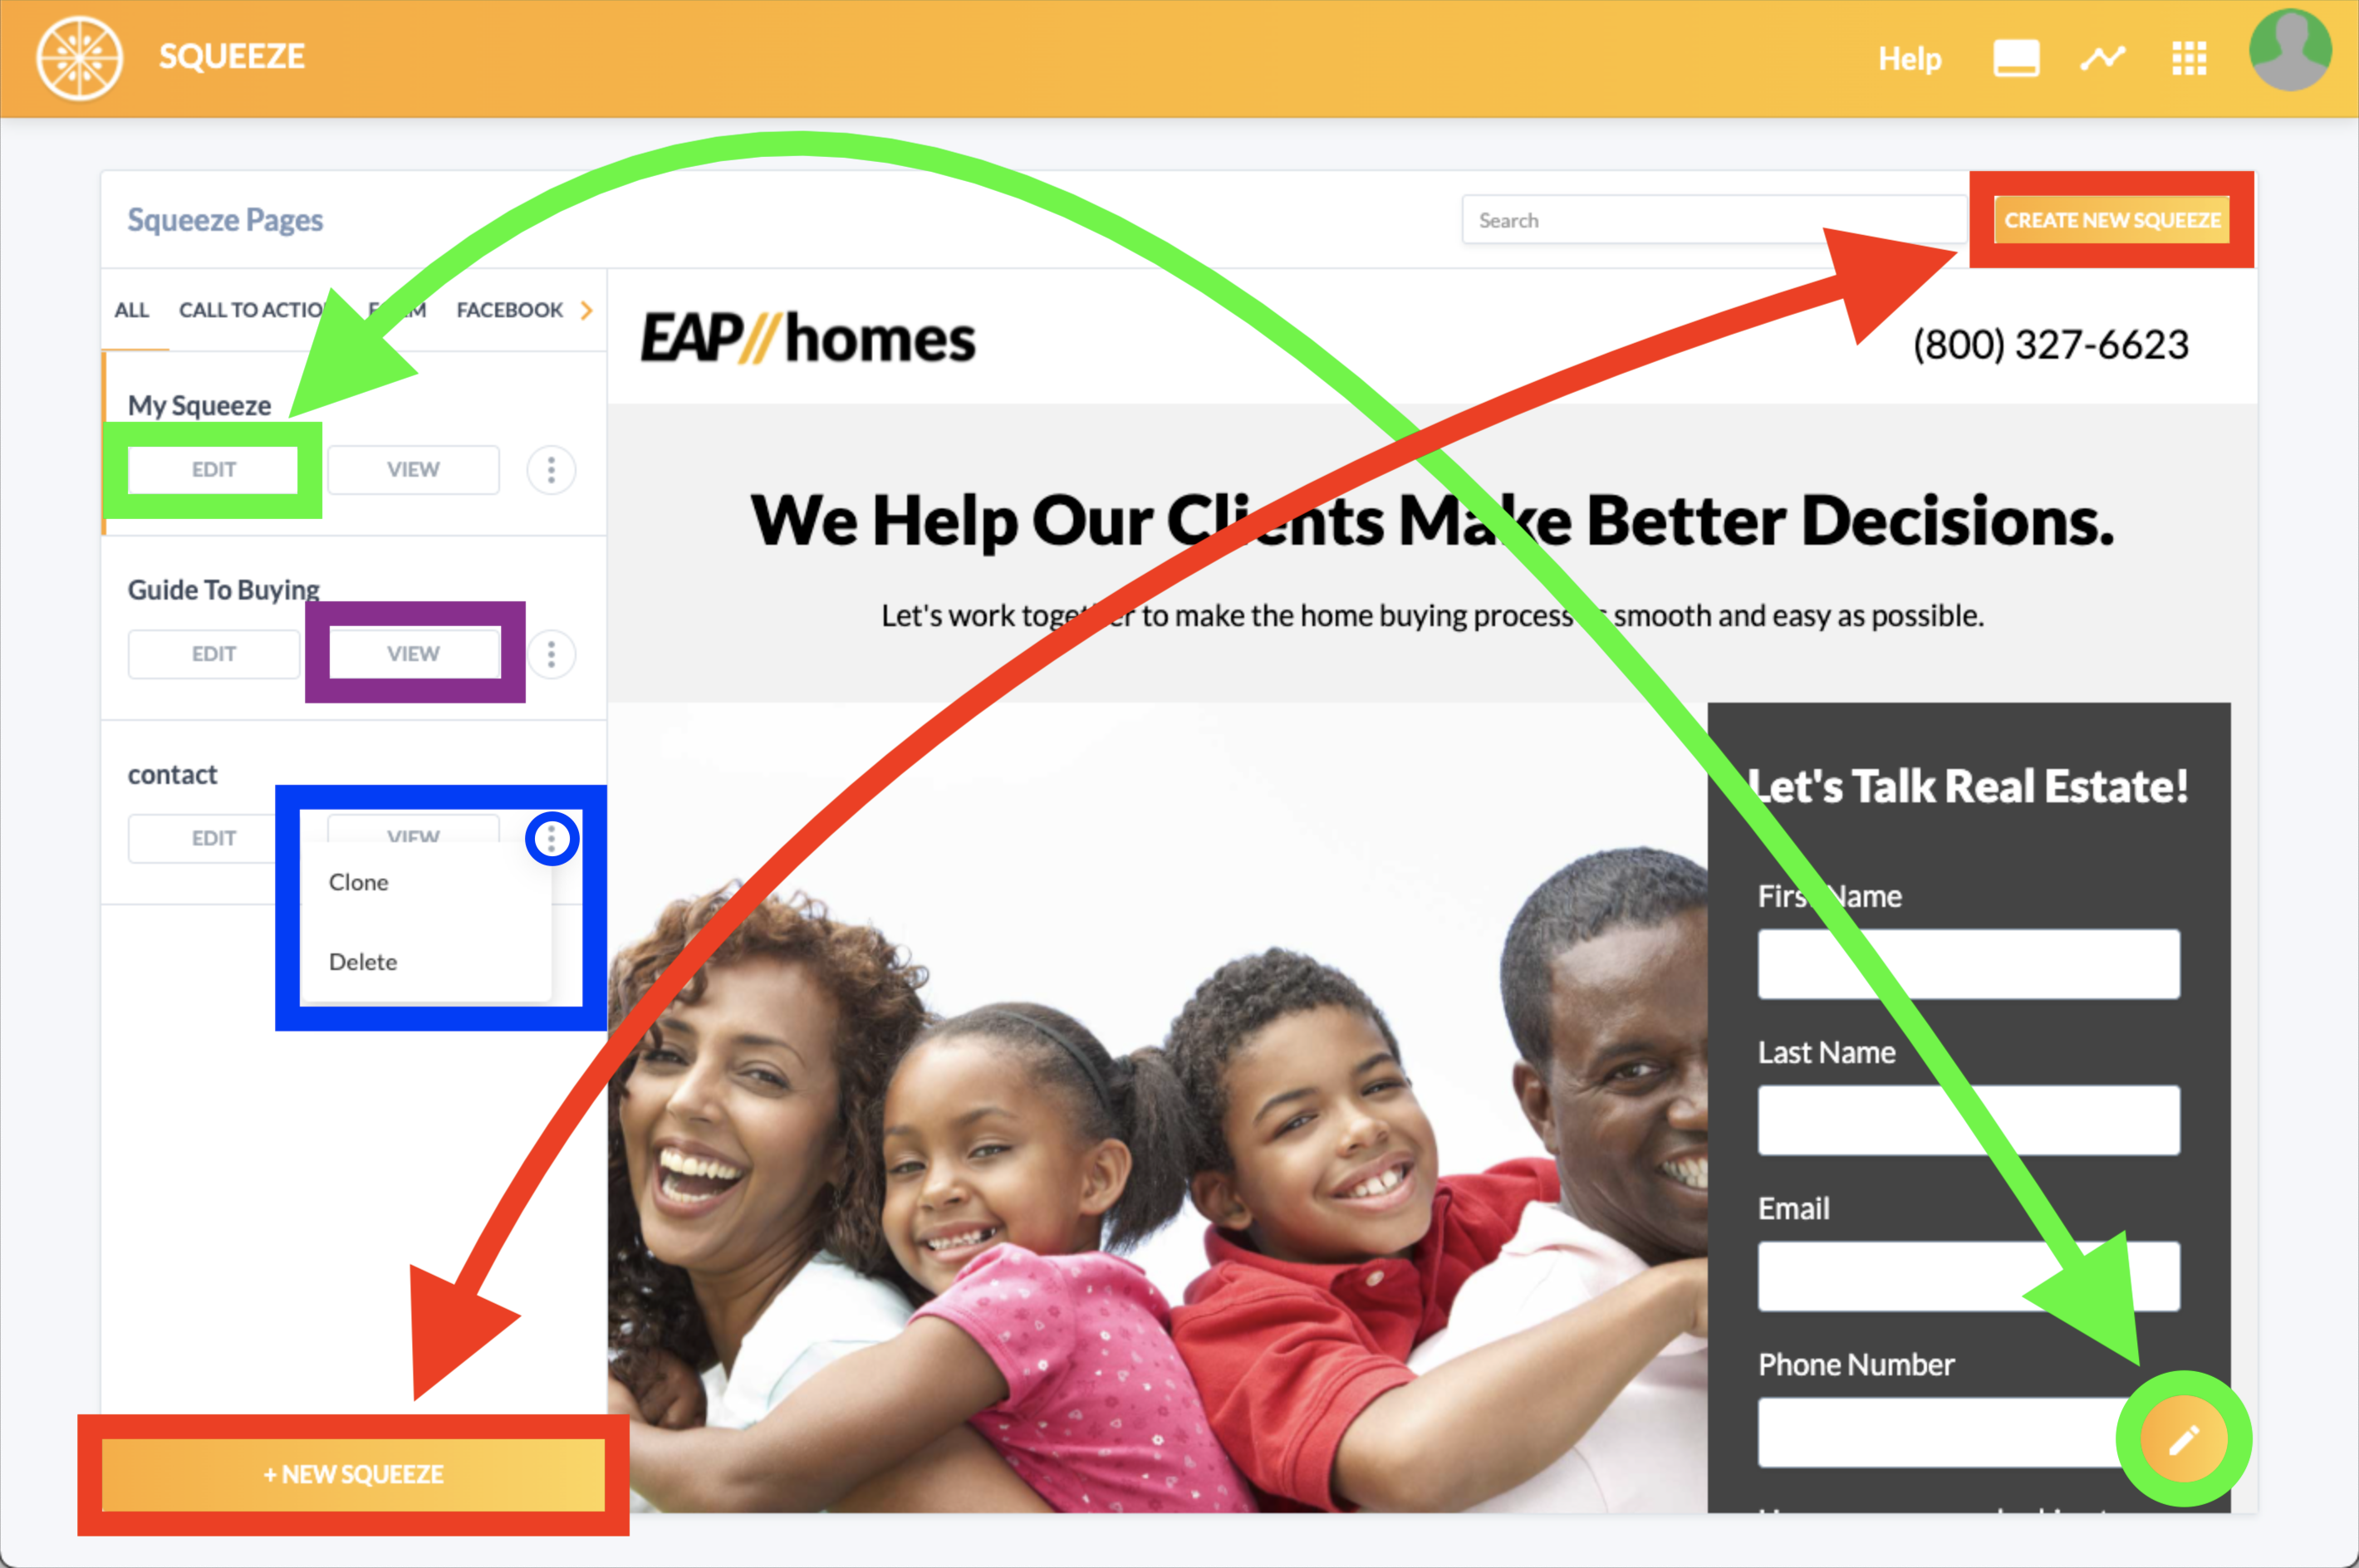
Squeeze app menu:
From the main page of the Squeeze app, you will find a list of pages you've created (if any), a preview of the currently selected Squeeze, as well as the following options:
- + Create New Squeeze
 Edit an existing Squeeze
-
⋮ Clone or Delete a Squeeze
-
Clone will publish an exact duplicate of the page, adding the word "clone" to its name and URL slug.
- Delete will permanently delete the page. There is no way to recover a deleted Squeeze.
-
- View a published Squeeze
-
View will open your page in a new browser tab. Use this to see your page as your visitors will see it, and to copy the URL for sharing.
-
Let's start by +Creating a New Squeeze.
- Choose a template: You can filter the templates from the categories list (on the left-hand side of the page), or choose from All of them.
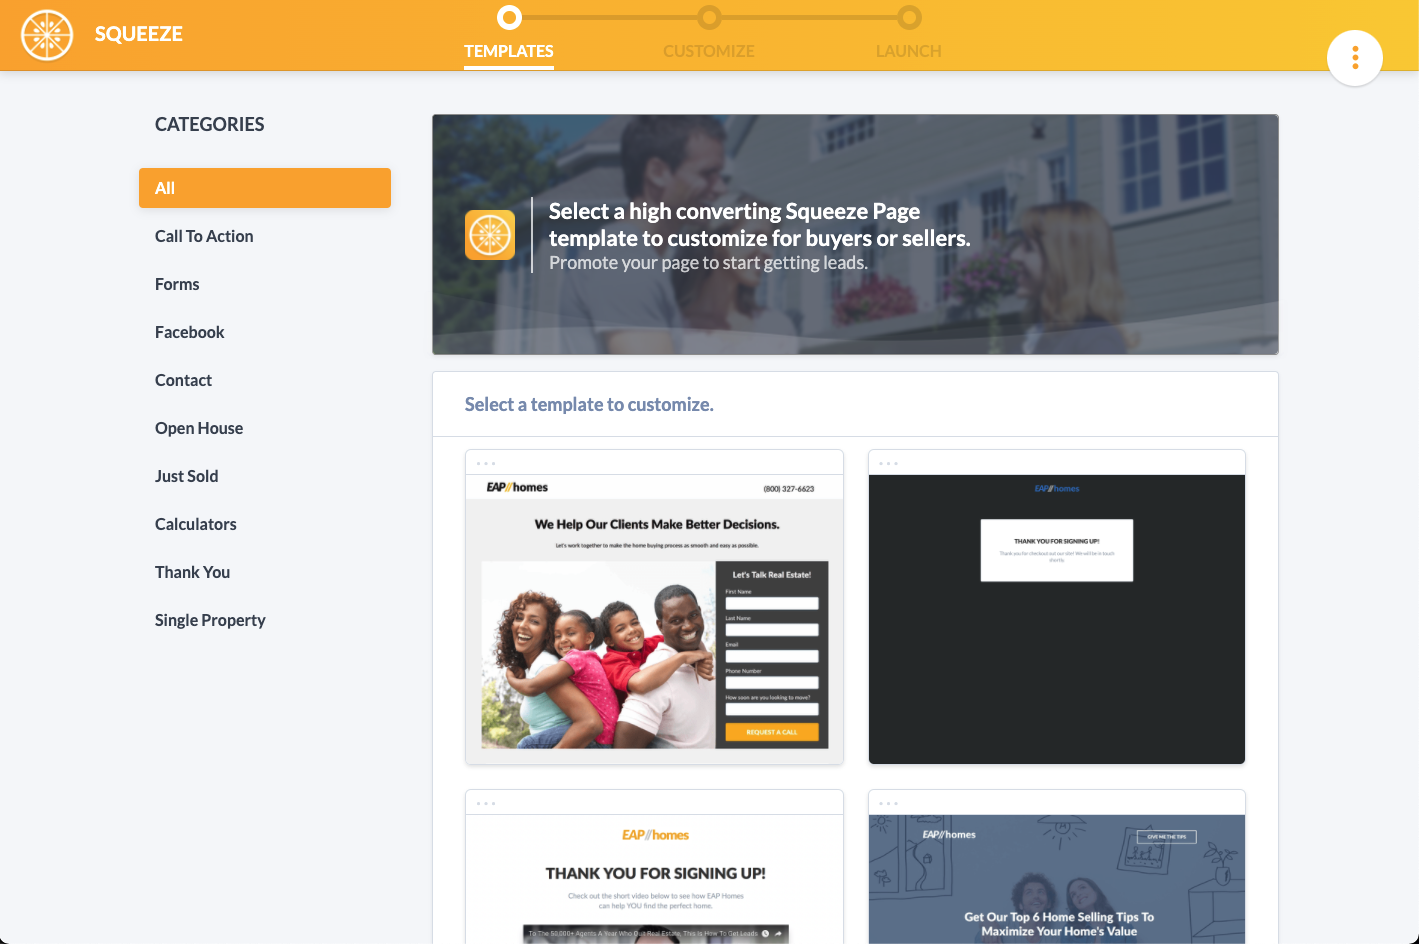
Templates are available with lead capture forms, Facebook sign-in buttons, embeddable YouTube videos, maps, mortgage calculators, and more!
- Editing Your Squeeze Page: Once you've selected a template, you can edit the landing page. Text, colors, images, videos, links, and pop-ups are all customizable. Some templates have more customization options than others.
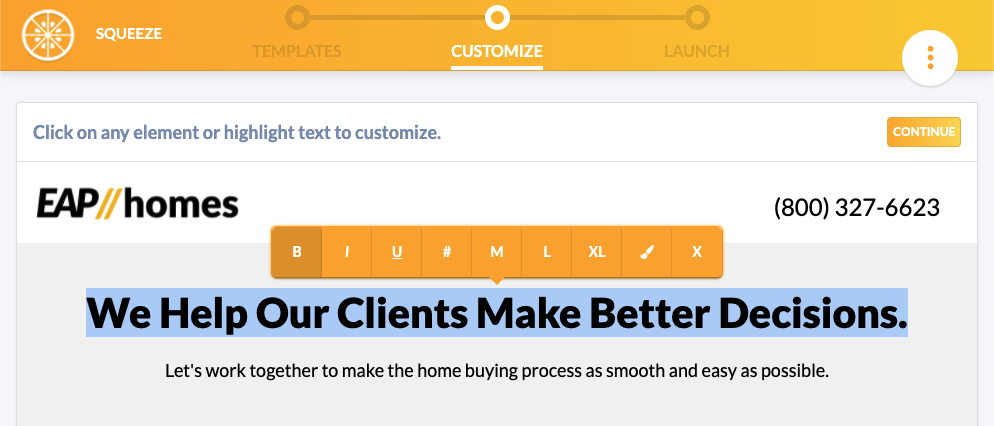
- Click into any text to edit the size, color, and verbiage:
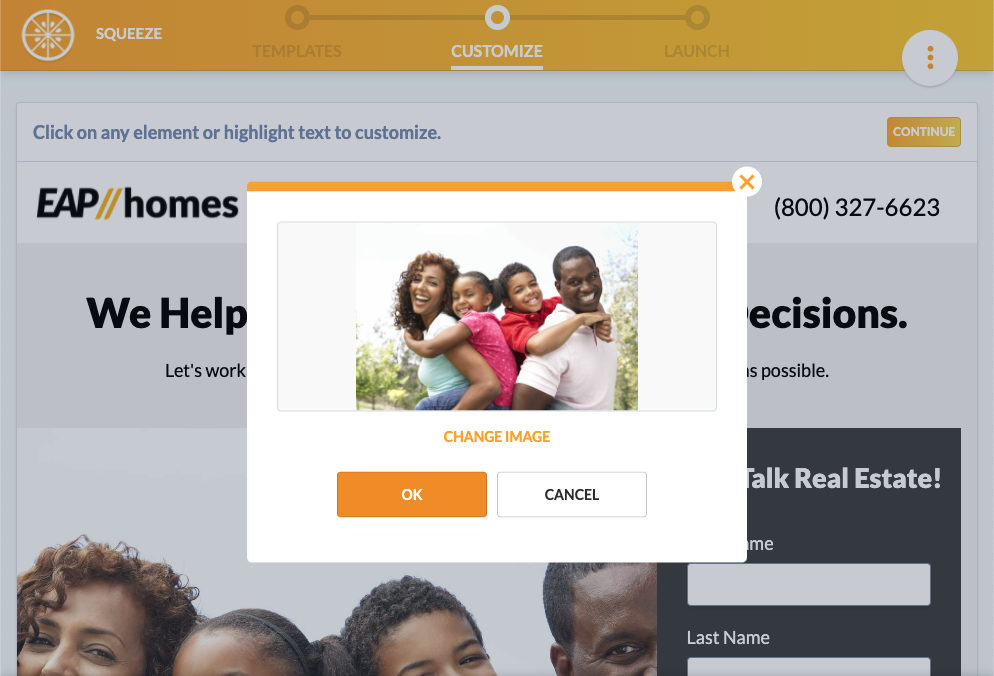
- Click on any photo or logo to change the image:
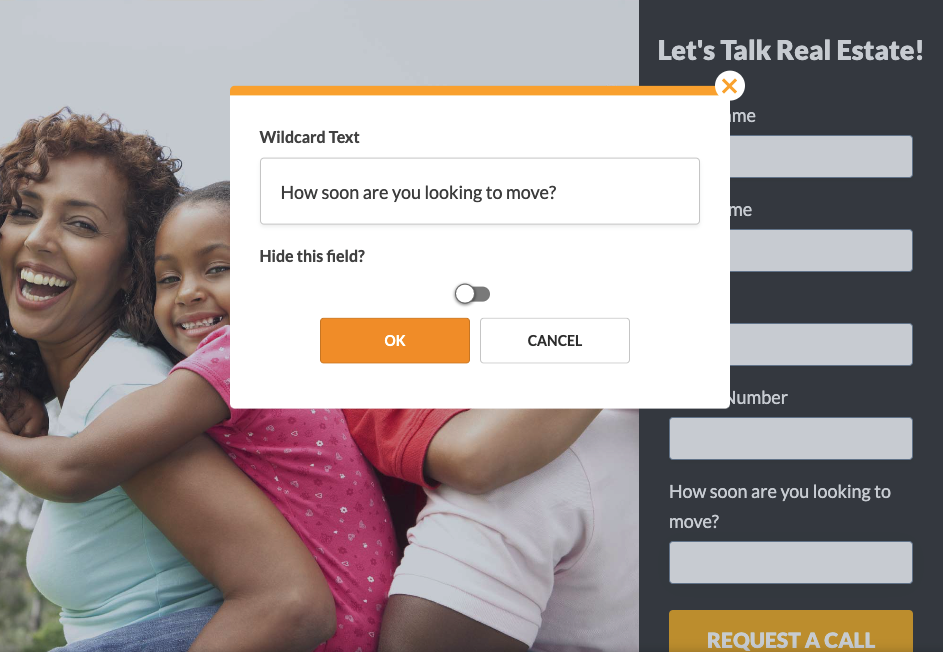
- If the template has a form, you can hide or change some of the options:
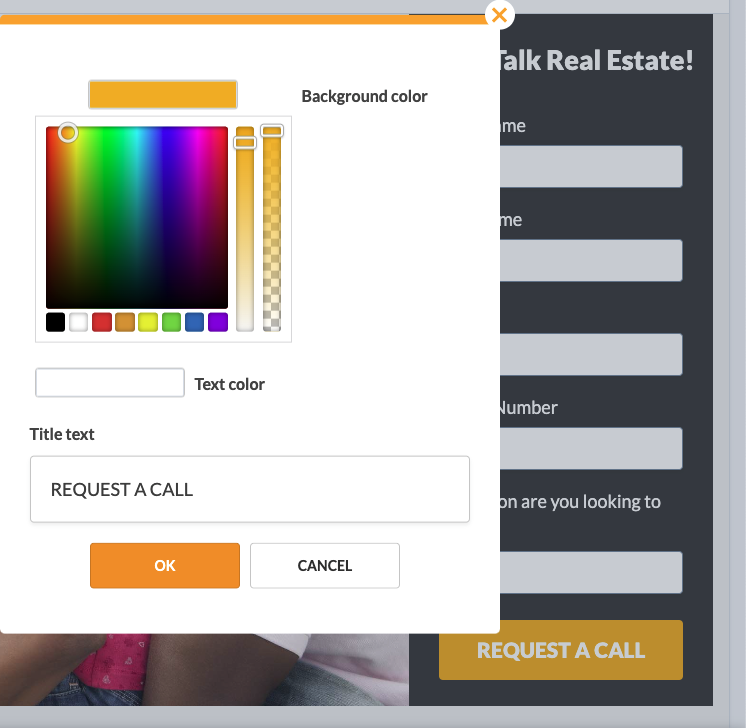
- Click on a button to update its text and colors:
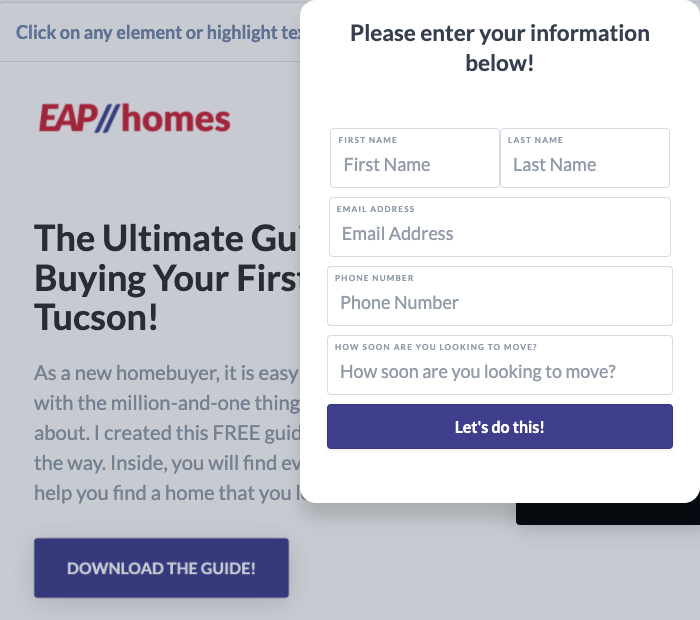
- If the template does not have a visible form, you can hover over the button to find the options to Edit the Pop-Up form:
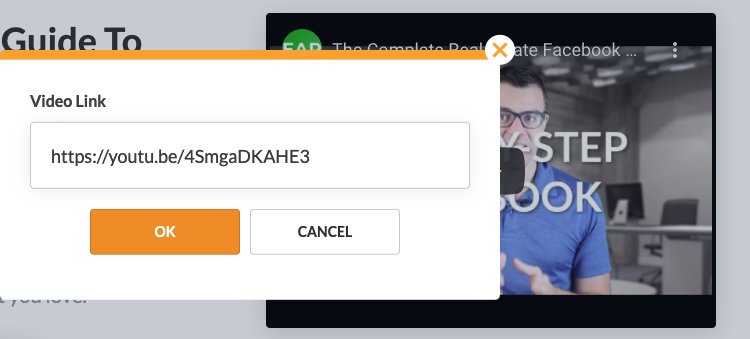
- If the template supports a YouTube video, click on the video preview to copy-paste your video's URL or share link:
- Click into any text to edit the size, color, and verbiage:
- At the bottom of every page editor are five icons associated with other LeadSite apps:

You can click these icons to edit additional options: Paths: Choose a path for the lead. You can set up paths in the Paths app.
 Texty: Automatically receive a text notification when a lead is captured, and/or automatically respond with a message to the lead. You can set up SMS lead notifications in the Texty app.
 Pixels: Toggle Facebook pixel tracking. You can also add additional pixels to the page. You can Install a Facebook Pixel to your LeadSite in the Pixels app.
 Find Me: Set the page's SEO Title and Description for when the page is found or shared. Leaving this blank will instead use the default SEO settings from the Find Me app.
 Social Share: Choose the page's Social Share Image. Leaving this blank will instead use the Social Share Image from your
  Homepages app.
- Click the Continue button when you are finished customizing your Squeeze page to move on to the next section. If you need to make changes, click the Customize tab at the top of the page to return to the page editor.
-
What should happen after a lead fills out this page?
At this point, you get to choose what your lead will receive after they submit their info. You can: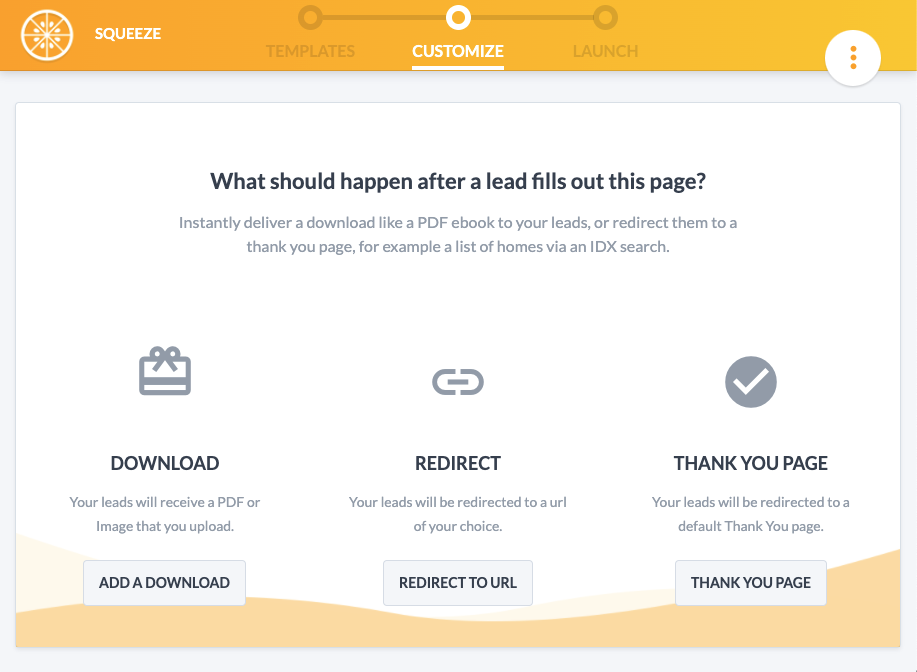
 Add a Download: Choose a file from your Media Library that will automatically download to the lead's device.
 Redirect to URL: Redirect the lead to another page, such as your Homepage, Contact page, an Instafarm, or another Squeeze, for example. This can also be used to redirect to a downloadable file from your cloud storage.
 Thank You Page: Send the lead to a default Thank You page.
After you've selected an option on this this page, confirm your choice by clicking Continue.
- If you did not complete all of the settings in step #3, you will be taken to the Pre-Launch Checklist.
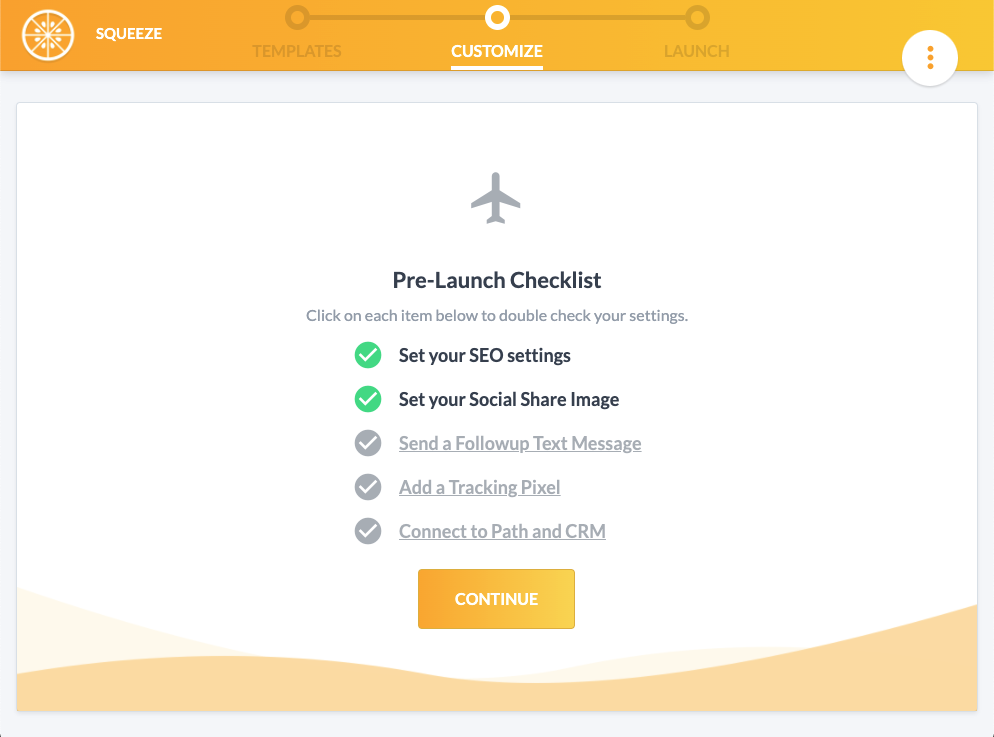
This is your chance to double-check and/or change your settings from step #3. A checkmark in a green circle means this task has been completed. A checkmark in a grey circle means this task has not been completed. Click the underlined text to open the associated popup and adjust the settings. None of these are required, and any can be modified later, but we do recommend completing at least:- Set your SEO settings
- Set your Social Share Image
…before launching your page. When you're ready, click Continue.
-
What should we call this Squeeze?
Finally, name your Squeeze page. The name will also determine the page's URL slug.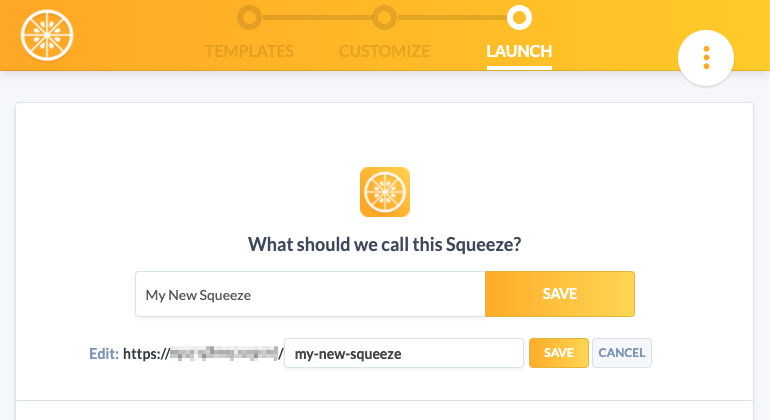
You can edit the slug by hovering over the URL link and clicking the edit button. Slugs can only contain English letters (a-z), Arabic numerals (Nos. 0-9), hyphens (-), and underscores (_). Unlike domains, slugs are case-sensitive, so it is recommended that you only use lowercase letters unless capitals are absolutely necessary. - When you're finished, click the big, orange Save button next to the Squeeze name. After that is completed, you can hover over the options ⋮ button in the upper-right corner and select Exit Editor ← to return to the main page.
Congratulations! You have created a New Squeeze page!
Editing an existing Squeeze:
To make changes to an already completed and published Squeeze page, go to the main Squeeze menu and find the page you want to edit in the sidebar on the left. You can search for a Squeeze by title using the Search bar in the upper-right. After you've located your Squeeze, you can then either click the Edit button under the Squeeze's name, or select the Squeeze to preview it, then click the Edit or button (see the green arrows ⤡ in the screenshot above).
Follow steps 2-8 above to make any changes you want to your Squeeze page, then be sure to click the Save button on the What should we call this Squeeze? section to make your changes live on your LeadSite.
- IMPORTANT: Every time you edit an existing Squeeze page, you must follow through the entire launch process again, even if you are only changing one element of it. Otherwise, any changes will not be saved.