Facebook has a very in-depth knowledge base on this information, so we recommend visiting the link below to get this info! https://www.facebook.com/business/help/651294705016616
You can also follow these instructions to install your Facebook pixel:
- Go to this link: https://www.facebook.com/ads/manager/pixel/facebook_pixel. If you aren't already signed into the account that manages your Facebook business page, you will need to.
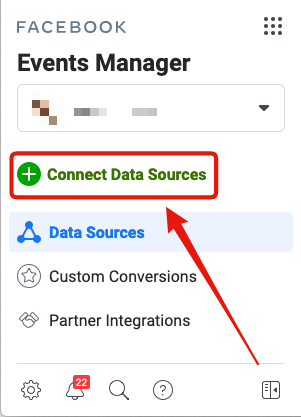
- Under your Events Manager, you will find a button ⊕ labeled "Connect Data Sources". Click it.
- A pop-up will appear.
• Under Connect a New Data Source, select Web, then click "Get Started".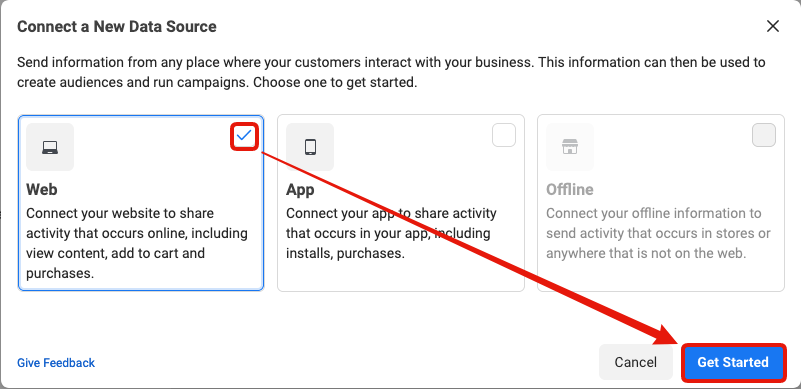
- On the next screen, Set up Web Events, select Facebook Pixel, then click "Connect".
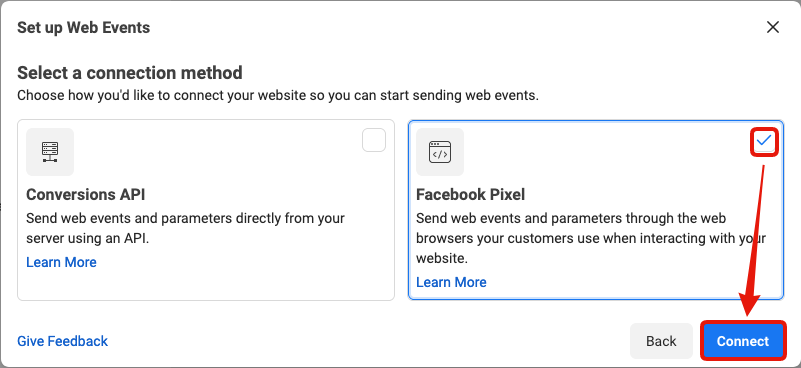
- The next page, Connect Website Activity Using Facebook Pixel prompts you to add details about your Pixel.
• Name Your Pixel
• Type or paste your LeadSite's URL. LeadSite URLs always begin with "https://" and do not use "www."
• Click "Continue"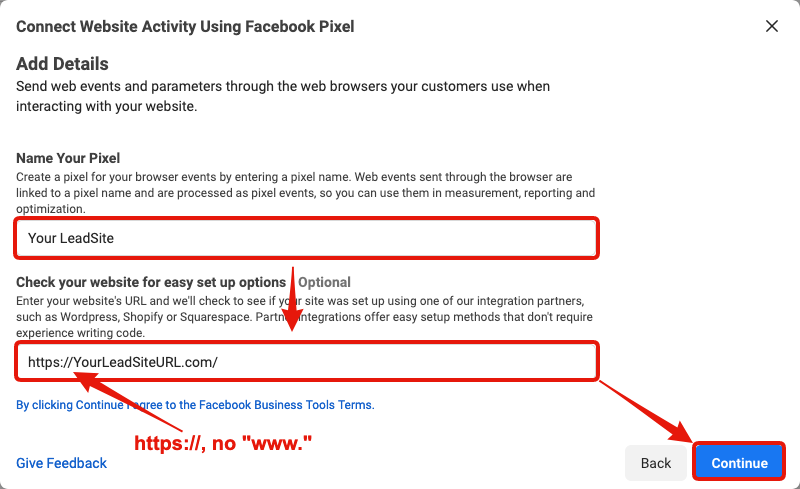
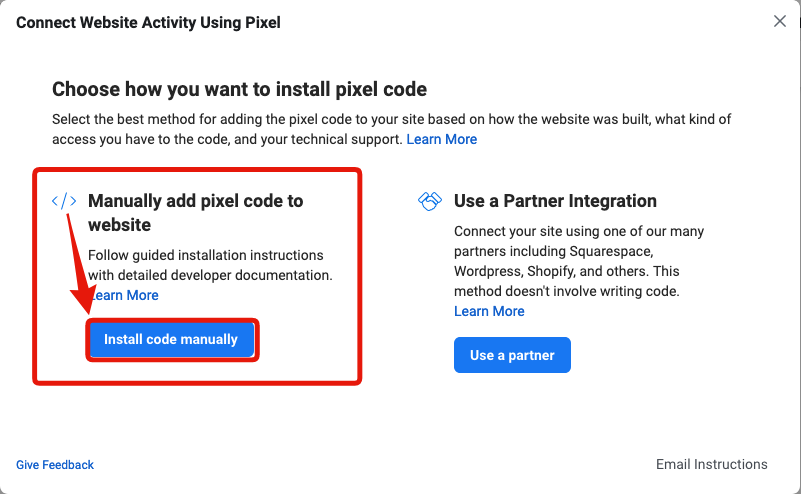
- From the following page, Connect Website Activity Using Pixel, you're going to manually add Pixel code to website by clicking "Install code manually".
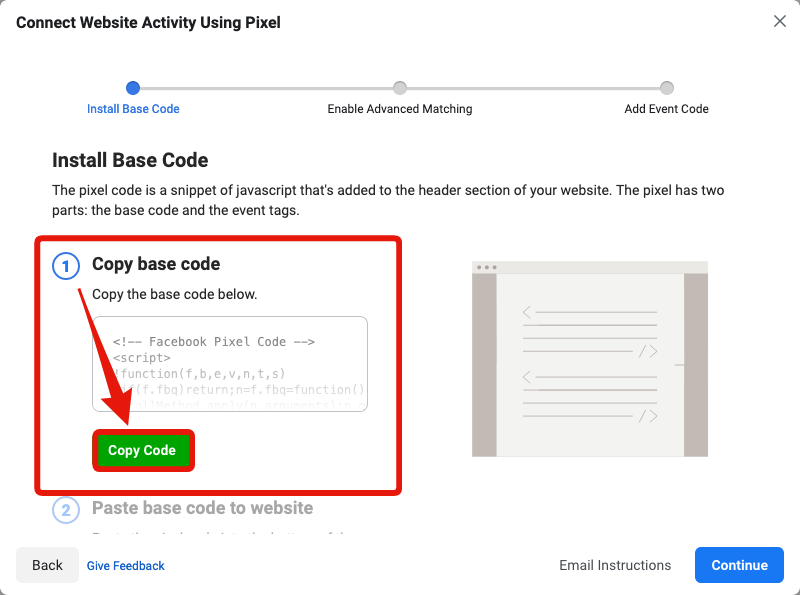
- In the next window, Connect Website Activity Using Pixel, click the "Copy Code" button to copy the Pixel base code to your clipboard.
- From there, go into your LeadSite's dashboard and navigate to the Pixels app, then paste that code into the Facebook Pixel text box, and click "Save Settings".
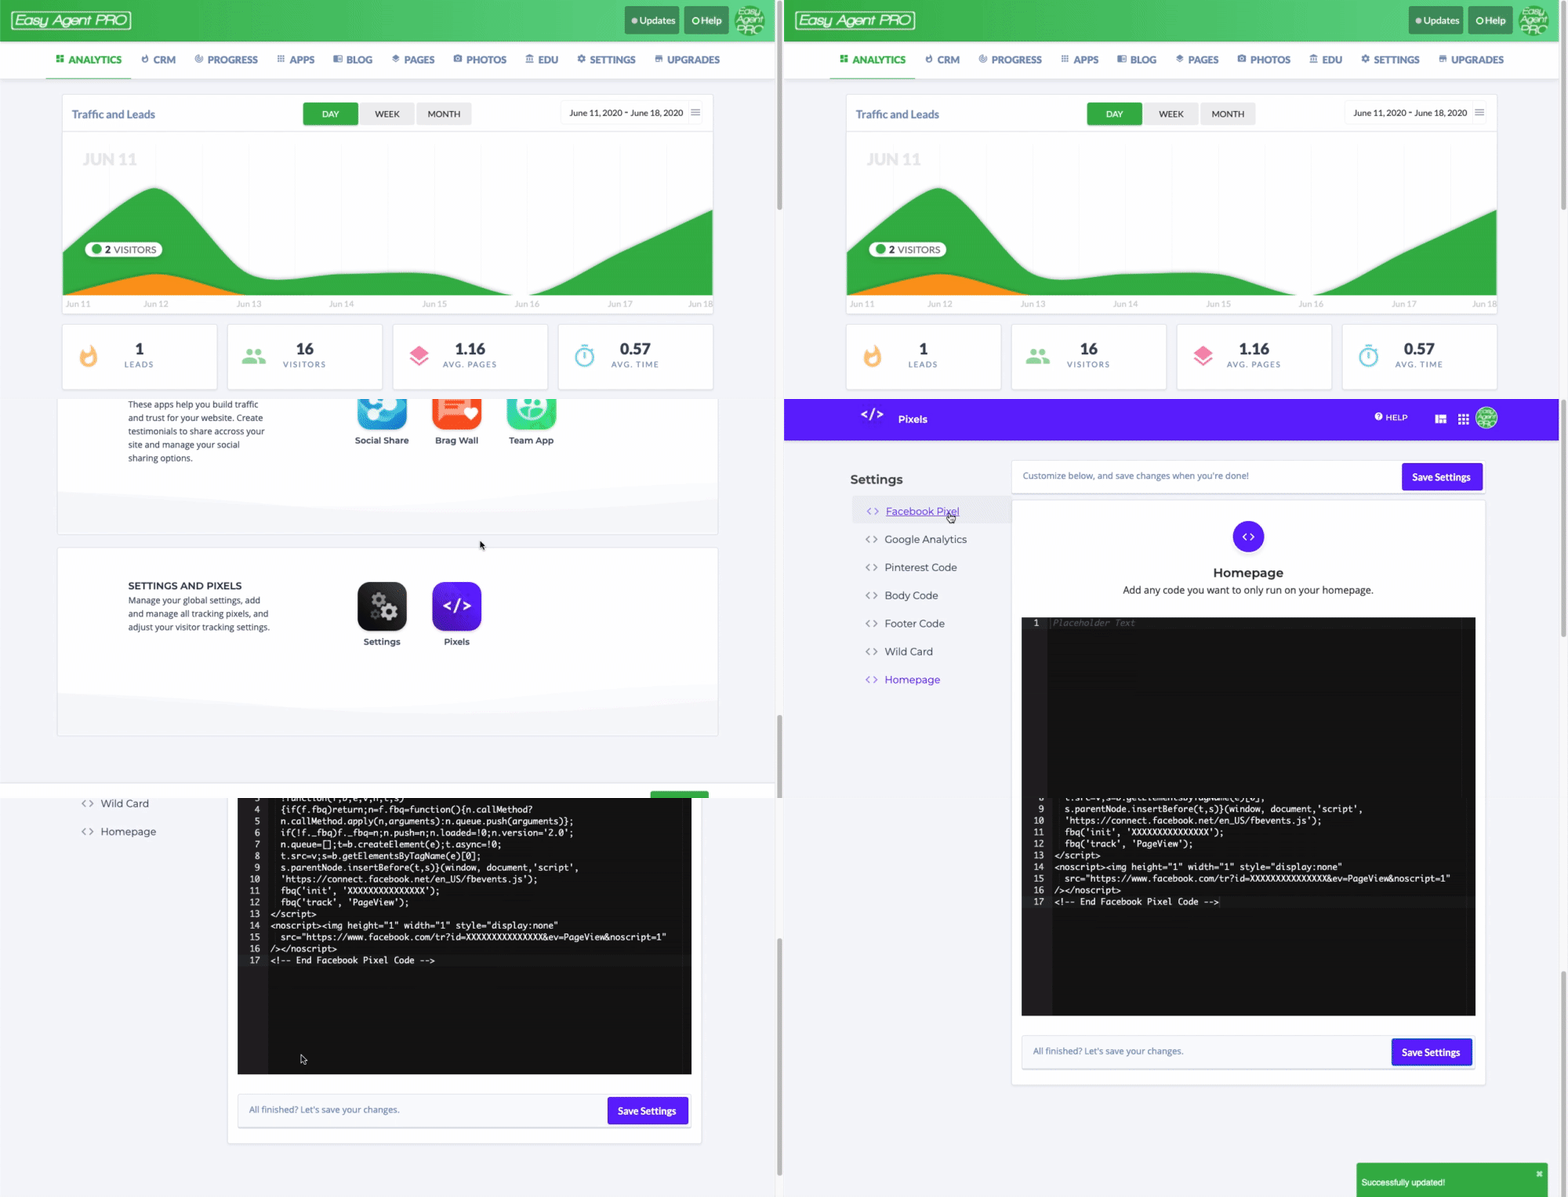
You're all set! You can now return to the Facebook Events Manager to setup Advanced Matching, and add events using the Events Setup Tool, as well as track events like advertisements pointing to your LeadSite!
